
We’ve all been there – we wake up one day before an important event, only to find our face puffed up! And there goes all of our careful preparations, the perfect dress, the complimentary makeup and all the efforts to look our best selves and take the perfect pictures. It’s heartbreaking, to say the least. However, there’s a way to save the day! Yes, it’s possible! Want to know how to lose face fat overnight? Look no further, we’ve got you covered.
Is It Even Possible To Lose Face Fat Overnight?
You might be skeptical. After all, it’s not easy to lose weight and burn fats instantly. And you’re right. However, losing face fats is different from trying to get rid of belly fats. In fact, your face can actually not store fats at all. It’s the last body part to get fat and first to get slim. Usually, you start to appear visibly slimmer, especially in your face and neck area after your body fat goes below 20%. Therefore, yes, it’s totally possible to lose face fat overnight if you’re not suffering from obesity or other serious conditions.
How To Lose Face Fats Overnight – 5 Key Steps You Need To Follow!
Follow these five steps if you want to know how to lose face fat overnight and prevent them from coming back.
1. Go Hard on Facial Exercises!
The best way to instantly get rid of chubby cheeks and puffiness is to do facial exercises. Seriously, they’re so effective it’s like magic. These easy exercises particularly target your jaw, chin and cheeks. According to research, they are helpful in improving facial appearance, muscle strength and even fight against aging and sagging skin. To know what specific exercises you should do to lose face fats quickly, skip to the last section.
2. Cardio or Aerobic Exercises is a Must
Everyone is aware of the benefits of aerobic exercises. It helps burn fats. Additionally, a study showed that cardio exercises helped lose weight in women suffering from obesity. That’s why, going for a run is one of the simplest and best ways you can lose puffy cheeks.
Read Also: Fasted Cardio
3. Are you Drinking? Alcohol is the Enemy!
One thing you must absolutely avoid if you want to lose face fats quickly is alcohol. Alcohol is really bad for your health overall but it also contributes to weight gain. Research shows that alcohol reduces the amount of leptin in the body – a hormone that increases the feeling of fullness, causing you to eat more. Consequently, you gain more weight and become puffy. It is essential that you avoid drinking the night before an important occasion.
4. Say GoodBye to Those Carbs if You Want to Lose Face Fat Quickly
Another thing that contributes significantly to weight gain is carbs. If you want to lose face fat quickly and naturally, eliminate them from your diet. This not only will help you become thin but also improve your overall health. In order to live healthier, it is imperative that you avoid carbs.
5. Reduce Your Sodium Intake
Another thing that makes your face instantly chubbier is sodium. Sodium doesn’t just refer to table salt. Even if you control your intake of table salt, you might still be ingesting it in huge quantities in processed foods and snacks. According to research, sodium retains fluids in your body. In other words, when you consume high sodium foods, your body cannot get rid of excessive water, which then accumulates in your face making it look puffier and chubbier. If you want to know how to lose face fat fast overnight, then you should definitely avoid sodium containing processed foods.
Read Also: How to Stay Hydrated
3 Best Facial Exercises to Lose Face Fats Overnight
As said earlier, facial exercises are super effective in losing face fats quickly and naturally. The following are the best face exercises you can do while sitting down where you are. They are incredibly low effort.
1. Puff up Your Cheeks
It’s as simple as it sounds. Simply, puff up your cheeks and fill them up with air. Do it so that you are exerting force against your cheek muscles. Hold this stance for 30 seconds. Repeat 10 reps with a ten seconds interval. Do as many sets of this as you want.
2. Chin Raising Exercise
First, jut out your lower jaw so that your lower lip rests over the upper lip. Then, raise your chin outwards. You will feel your neck and chin muscles strain and stretch. Hold this position for at least 30 seconds, then relax. Now, tilt your head to the side and repeat the exact same steps on both sides. Do 10 reps on each side with a few seconds interval. You can repeat this as many times as you want. Just be careful, it will put a strain on your jawline. So, always start slow and increase the repetitions as you go. This exercise is extremely helpful in getting rid of double chin as well.
3. Fish face Exercises
This is the opposite of puffing your cheeks. Instead, you’re supposed to suck them in. And that’s it. Simply, hold this stance for as long as it’s comfortable. For the best and fastest results, alternate between these three exercises at every set.
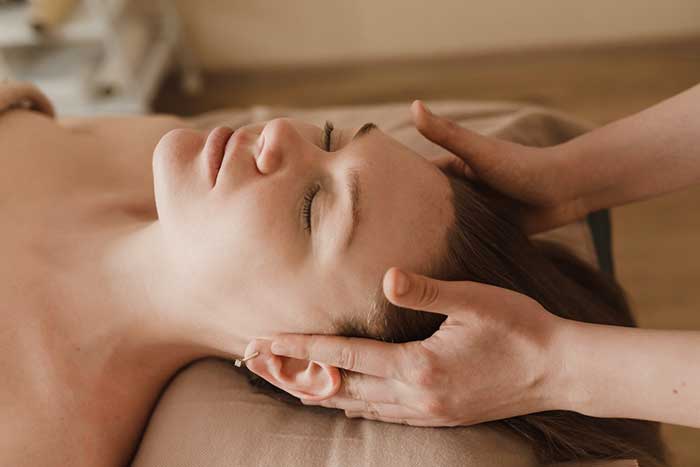
Additionally, you can also try out the smiling exercise. In this, you should stretch your cheeks into a smiley face until you can feel your muscles straining. Make sure to warm up before doing these facial exercises and massage afterwards. Furthermore, you can get help from YouTube videos for a better demonstration of how to lose face fat overnight exercises.
Conclusion:
Losing face fat is a considerably easy task. You just have to keep an eye on your diet and include facial exercises in your daily workout routine.


