

Staining maple wood is often a challenging task. Despite putting in all the due efforts, wood experts often end up with unsatisfactory results. Are you among them, too? Don’t worry! It’s not your fault. It is the method you follow. You only need to tweak the process a bit, and you will witness some great results.
When done correctly, maple wood staining will produce some fabulous results. The shiny and glorified wooden products will overwhelm you after completing the project.
Let’s discover how you can enjoy flawless and hassle-free maple wood staining.
Properties of Maple Wood
To end up with a perfectly stained maple wood, you need to know its properties first. The more you know it, the better you can stain it. Most of us are well aware of the fact that maple is the type of wood that is affordable.
It is used for furniture and heavy-use items not only because it’s inexpensive but also because it is ultra-durable. It is a great option for making cabinetry, flooring, high-end furniture, and kitchen accessories.
For some people, a maple wood desk is preferred over a Cocobolo Desk. This solid, long-lasting wood, presents a characteristic straight wood grain. It is highly resistant to decay.
Read More: History of Cocobolo
Is It Hard to Stain Maple Wood?
Stained maple cabinets enhance the ambiance and perfectly complement the interiors. But staining them to get that final look is daunting, even for the expert furnishers. Often, you will end up with a blotchy look with an uneven tone.
This will frustrate you, and you might have to start the staining again. You need to slow down here and understand the actual reason behind it. Once you know the problem, you can easily figure out its solution.
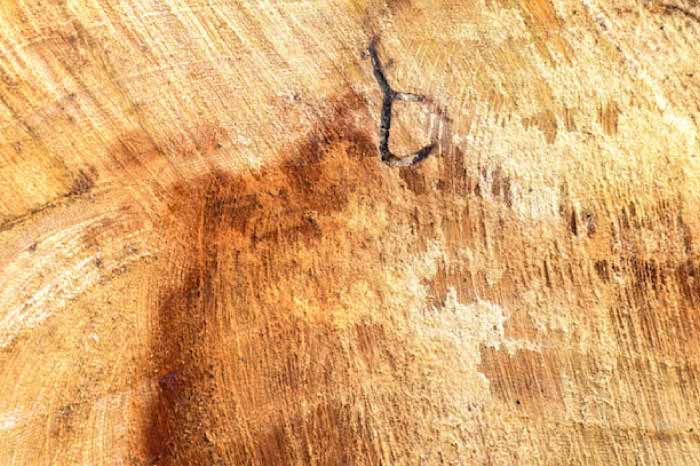
Have a close look at the surface of the maple cabinets. The wood grain appears to be even-grained and uniform to the eyes. On a closeup, you will witness how uneven the texture is. It is the main reason behind the blotchy look. While staining, the less dense areas of the wood appear darker, and the denser region appears lighter.
Every staining endeavor comes with the potential for an unpredictable, blotchy outcome. Yet, armed with care and patience, you can tackle this challenge.
4 Tips for Staining Maple Wood
If you’re ready to take it on, we have some actionable tips to equip you to conquer blotchiness while staining hard maple.
1. Select a Clear Wood Dye
Highlighting the beauty of tight-grained maple wood can be challenging with traditional wood stains. Consider clear finishes or wood dyes for a smoother, more predictable outcome.
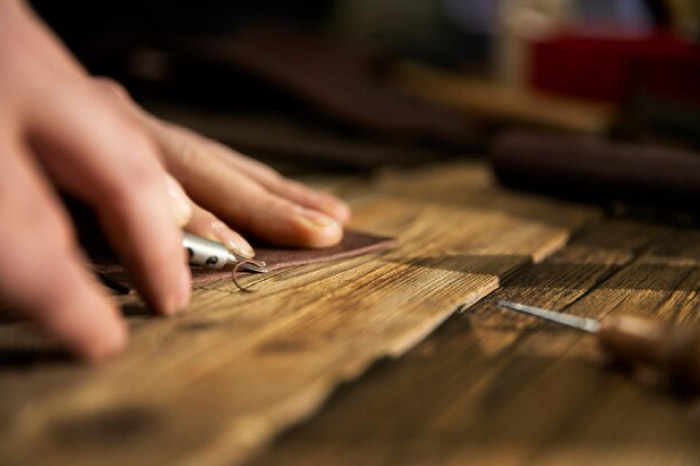
2. Prepare Wood by Sanding
Before diving into the staining process, meticulous preparation is essential to avoid blotchiness. Also, take all the precautionary measures to avoid staining the concrete during the process. Properly sanding and treating the wood is the foundation for success.
3. Pre-Staining Treatment
To enhance your chances of achieving uniform coloring, apply a pre-staining treatment such as a sealer or wood conditioner. This step limits stain penetration and promotes even absorption by the wood.
4. Sealing End Grains with Coat of Glue
End grain areas tend to absorb stains unevenly and become darker. Prevent this issue by sealing the end grain with a coat of glue, ensuring a more consistent appearance throughout your project.
Taking these proactive steps will make your maple wood staining project a rewarding success, with a beautifully even and professional finish.
3 Ways to Fix Blotchy Wood after Sanding
Even after doing everything, you might end up getting a blotchy finish. Don’t get frustrated; it is not your expertise’s fault. The wood type is a bit challenging when it comes to staining.
It gets split with an axe from a tree having deeply notched opposite leaves and a characteristic uneven texture. Consider toning the finishing coat or introducing a glazing technique to the final stain when faced with a less-than-ideal result.
If these approaches fall short, the ultimate remedy lies in the ability to strip and sand your work, offering a fresh start with room for adjustments.
1. Carefully Tone Your Finish
Begin by applying a finish coat to your project. After the finish has dried, you have two options for toning:
- Spraying a Pigment – Experiment with spraying a pigment onto the finish.
- Wiping on Gel Stain – Alternatively, you can apply a gel stain with a paintbrush and rag, which is a simpler method.
For a more customized approach, dissolve the pigment in the finish you’re using or in a suitable solvent like lacquer thinner. You can either darken the entire surface for uniform color or focus on the edges for an antique appearance.
2. Wood Glazing
Consider using a glaze to minimize the contrast between areas with differing stain penetration. However, this may result in a darker hue. Once the stain is dry, apply a wash coat of shellac.
After the shellac dries, gently scuff it with 320-grit sandpaper. Brush on a brown-colored glaze, then wipe away the excess to achieve a more consistent color on your maple cabinets.
3. Prepare Wood for Refinishing
If toning or glazing doesn’t resolve the issues or your stain remains excessively blotchy, it’s time to start anew. Begin by stripping and sanding the wood to prepare for refinishing.
If you have encountered persistent problems with uneven stain or dye, consider opting for a clear finish on your second attempt. A clear finish can highlight the wood’s natural features with reduced risk.
Conclusion
Given the intricacies of staining maple wood, developing a routine of testing various finishes on spare wood remnants from your project is prudent. You can easily consider using its scrap since maple wood is not among the most expensive woods.
This preliminary experimentation allows you to fine-tune your approach and ensure the perfect finish for your full-scale stained maple cabinets.


